Help Article
Activity - Text Library

Purpose
Text Libraries let you create generic text for Activity entries. Instead of writing the same notes repeatedly, you can set up text (with placeholder values or details) that users simply fill in. This saves time, ensures consistency, and reduces manual typing errors.

For example, say you need to provide a note for each concrete cylinder pickup your team performs. You could create the following library:

- When applied, placeholders (shown in
{{ }}) prompt the user to fill in project-specific details, making documentation both fast and standardized. - In addition to adding the Text Libraries, you also will need to build Forms that reference Text Library content.
- The easiest way to do this is to copy the Activity Log template form into a new or existing Form.
This article will show you how to build and use Text Libraries across your Activity entries.
Building Text Libraries: What to Expect
Text Libraries use a three-level hierarchy: Area → Category → Sub-Category:
- Area (E.g., Concrete)
- Contains one or more categories
- Category (E.g., Laboratory)
- Contains one or more sub-categories
- Sub-Category (E.g., Compressive Strength)
- Lowest-level; contains the actual text libraries that can be assigned to Activity entries
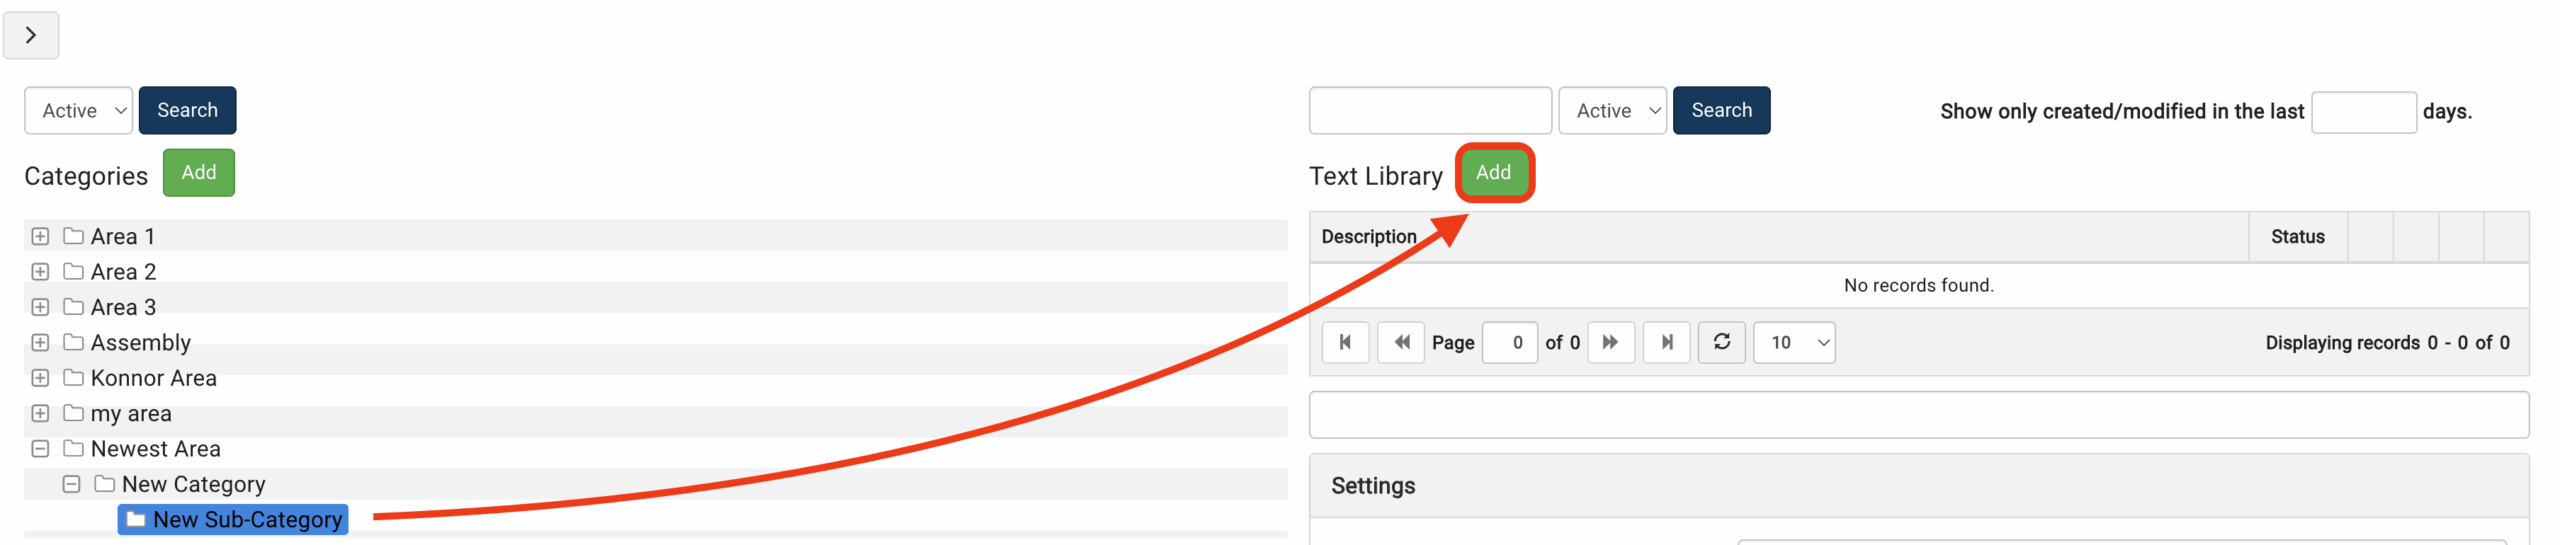
- Start by using the Add button in the upper-left to create and name your first Area.

2. Right-click your new Area and press Add to create a new Category within it.

3. Right-click your new Category and press Add to create a new Sub-Category within it.
4. Select your Sub-Category, then press Add (in Text Library table) to start adding creating your libraries. Remember: libraries can only be added to a Sub-Category.
Creating & Managing Text Libraries
Creating or editing a library will open the following window. Here you can add a description, limit the library to specific offices, and generate the actual text it contains. To make a text library available to all offices (Global), you will need the Manage Global Text Library permission.

Adding Placeholder Variables
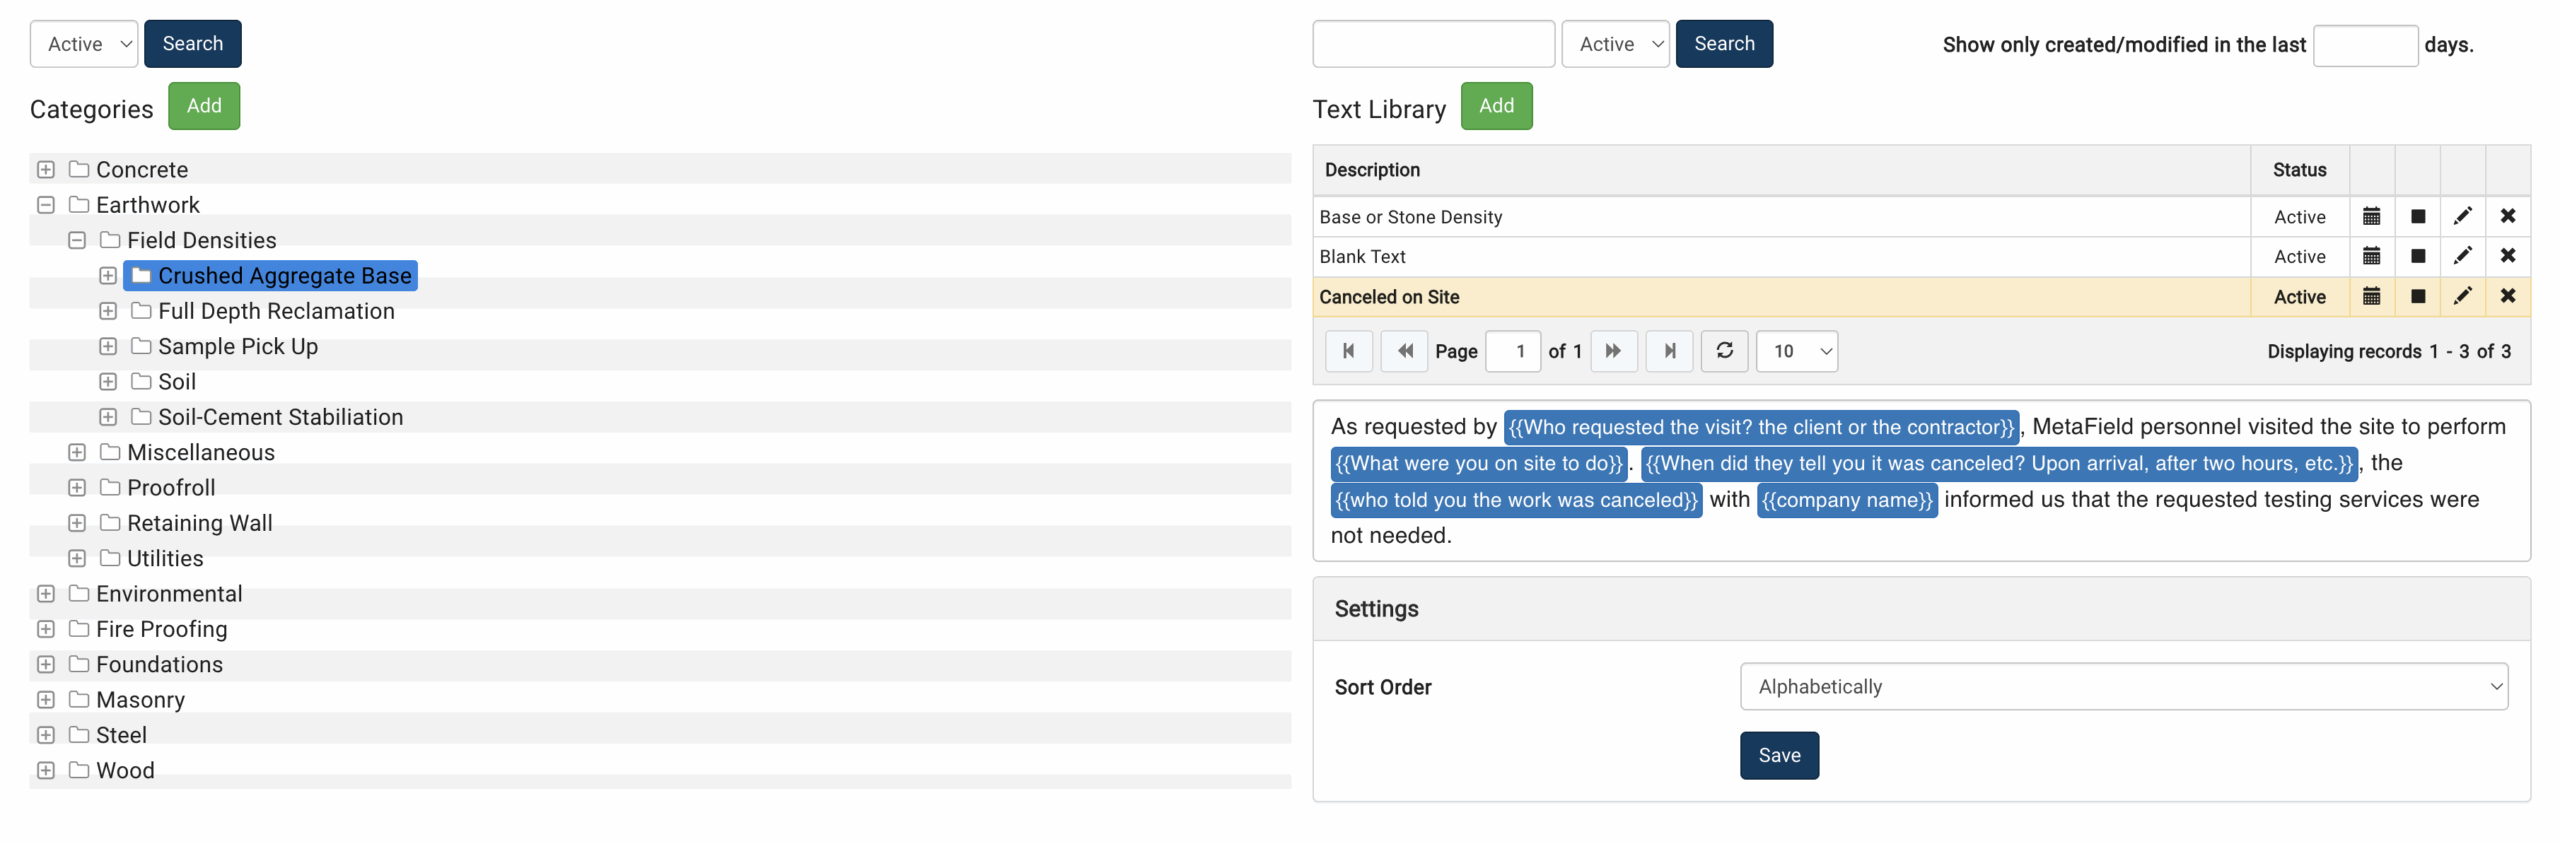
Placeholder variables can be used in the text block. These variables act as form fields that need to be answered when a user creates an Activity entry referencing the library. Placeholder fields should contain {{ }} around them. One best practice is using clear, short placeholder names that map to the field or value you expect (e.g., {{ProjectName}}).
Below are a few examples of Text Libraries you can use or tweak to suit your needs. Note the Area → Category → Sub-Category structure each entry follows.


Adding Text Libraries to Activity Forms
Now that we've explored how to create Text Libraries, let's walk through an example in the system:
Step 1.
We create our Text Library Area, Category, Sub-Category, and the Text Library itself - including a few generic example placeholders:

Step 2.
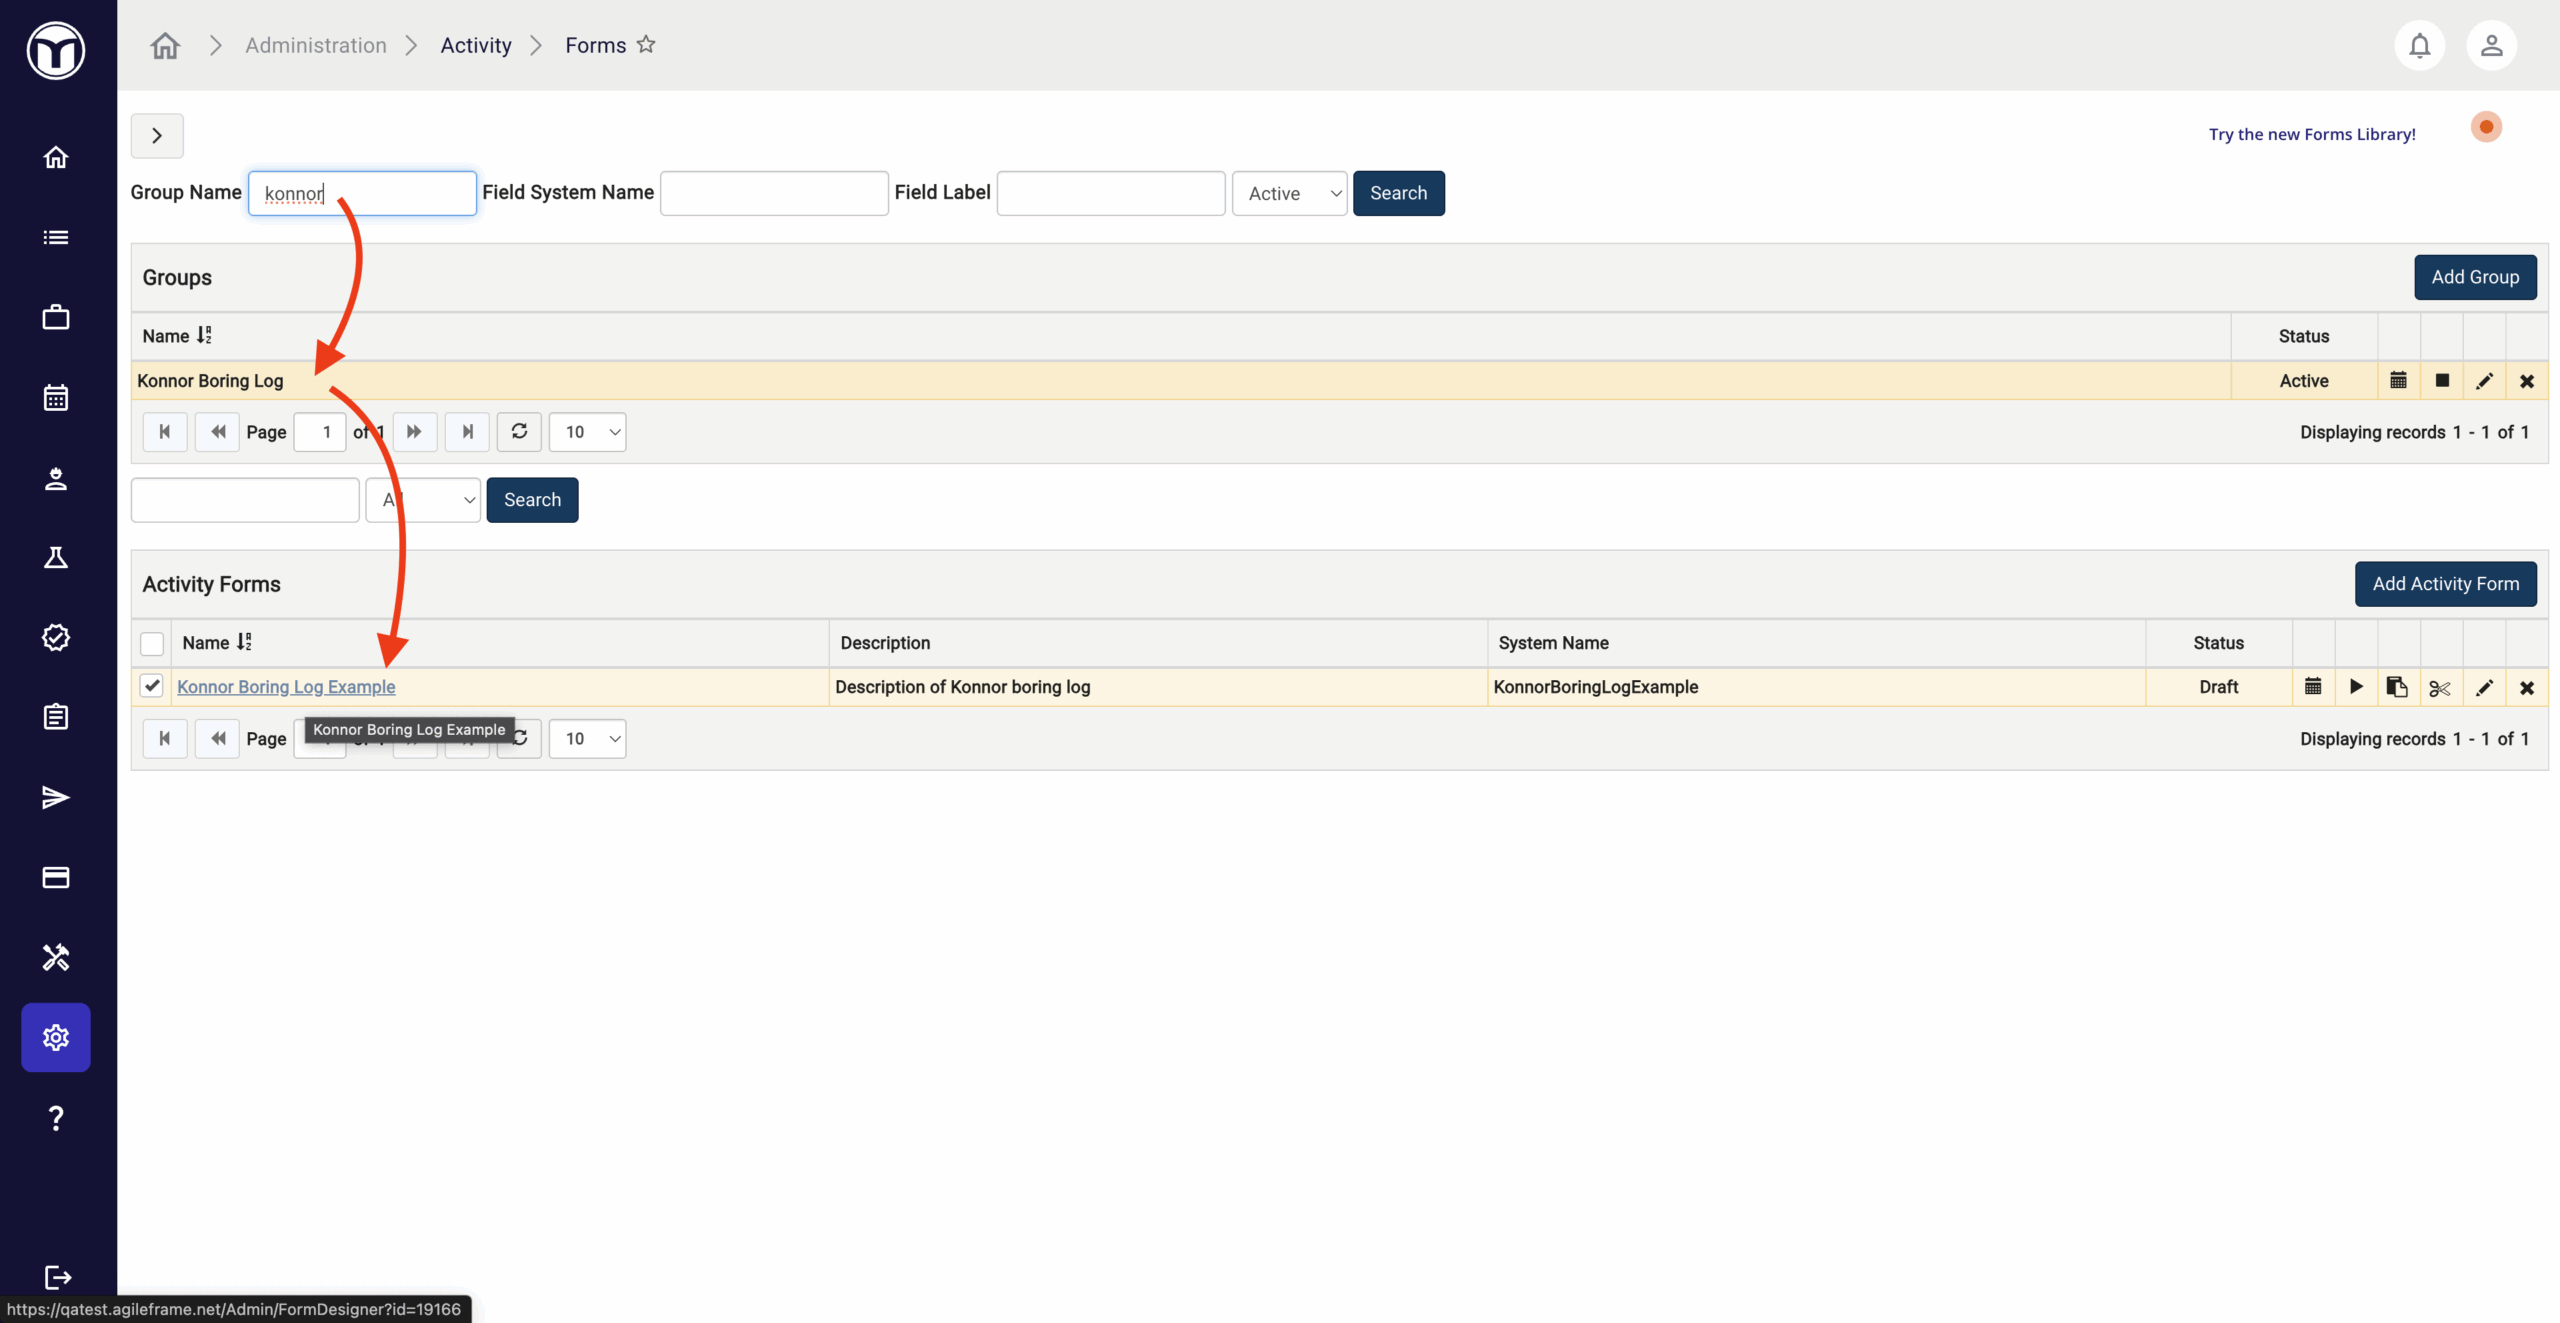
We navigate to Admin → Activity → Forms, search by Group name, then open our Boring Log Activity Form in the Form Designer.

Step 3.
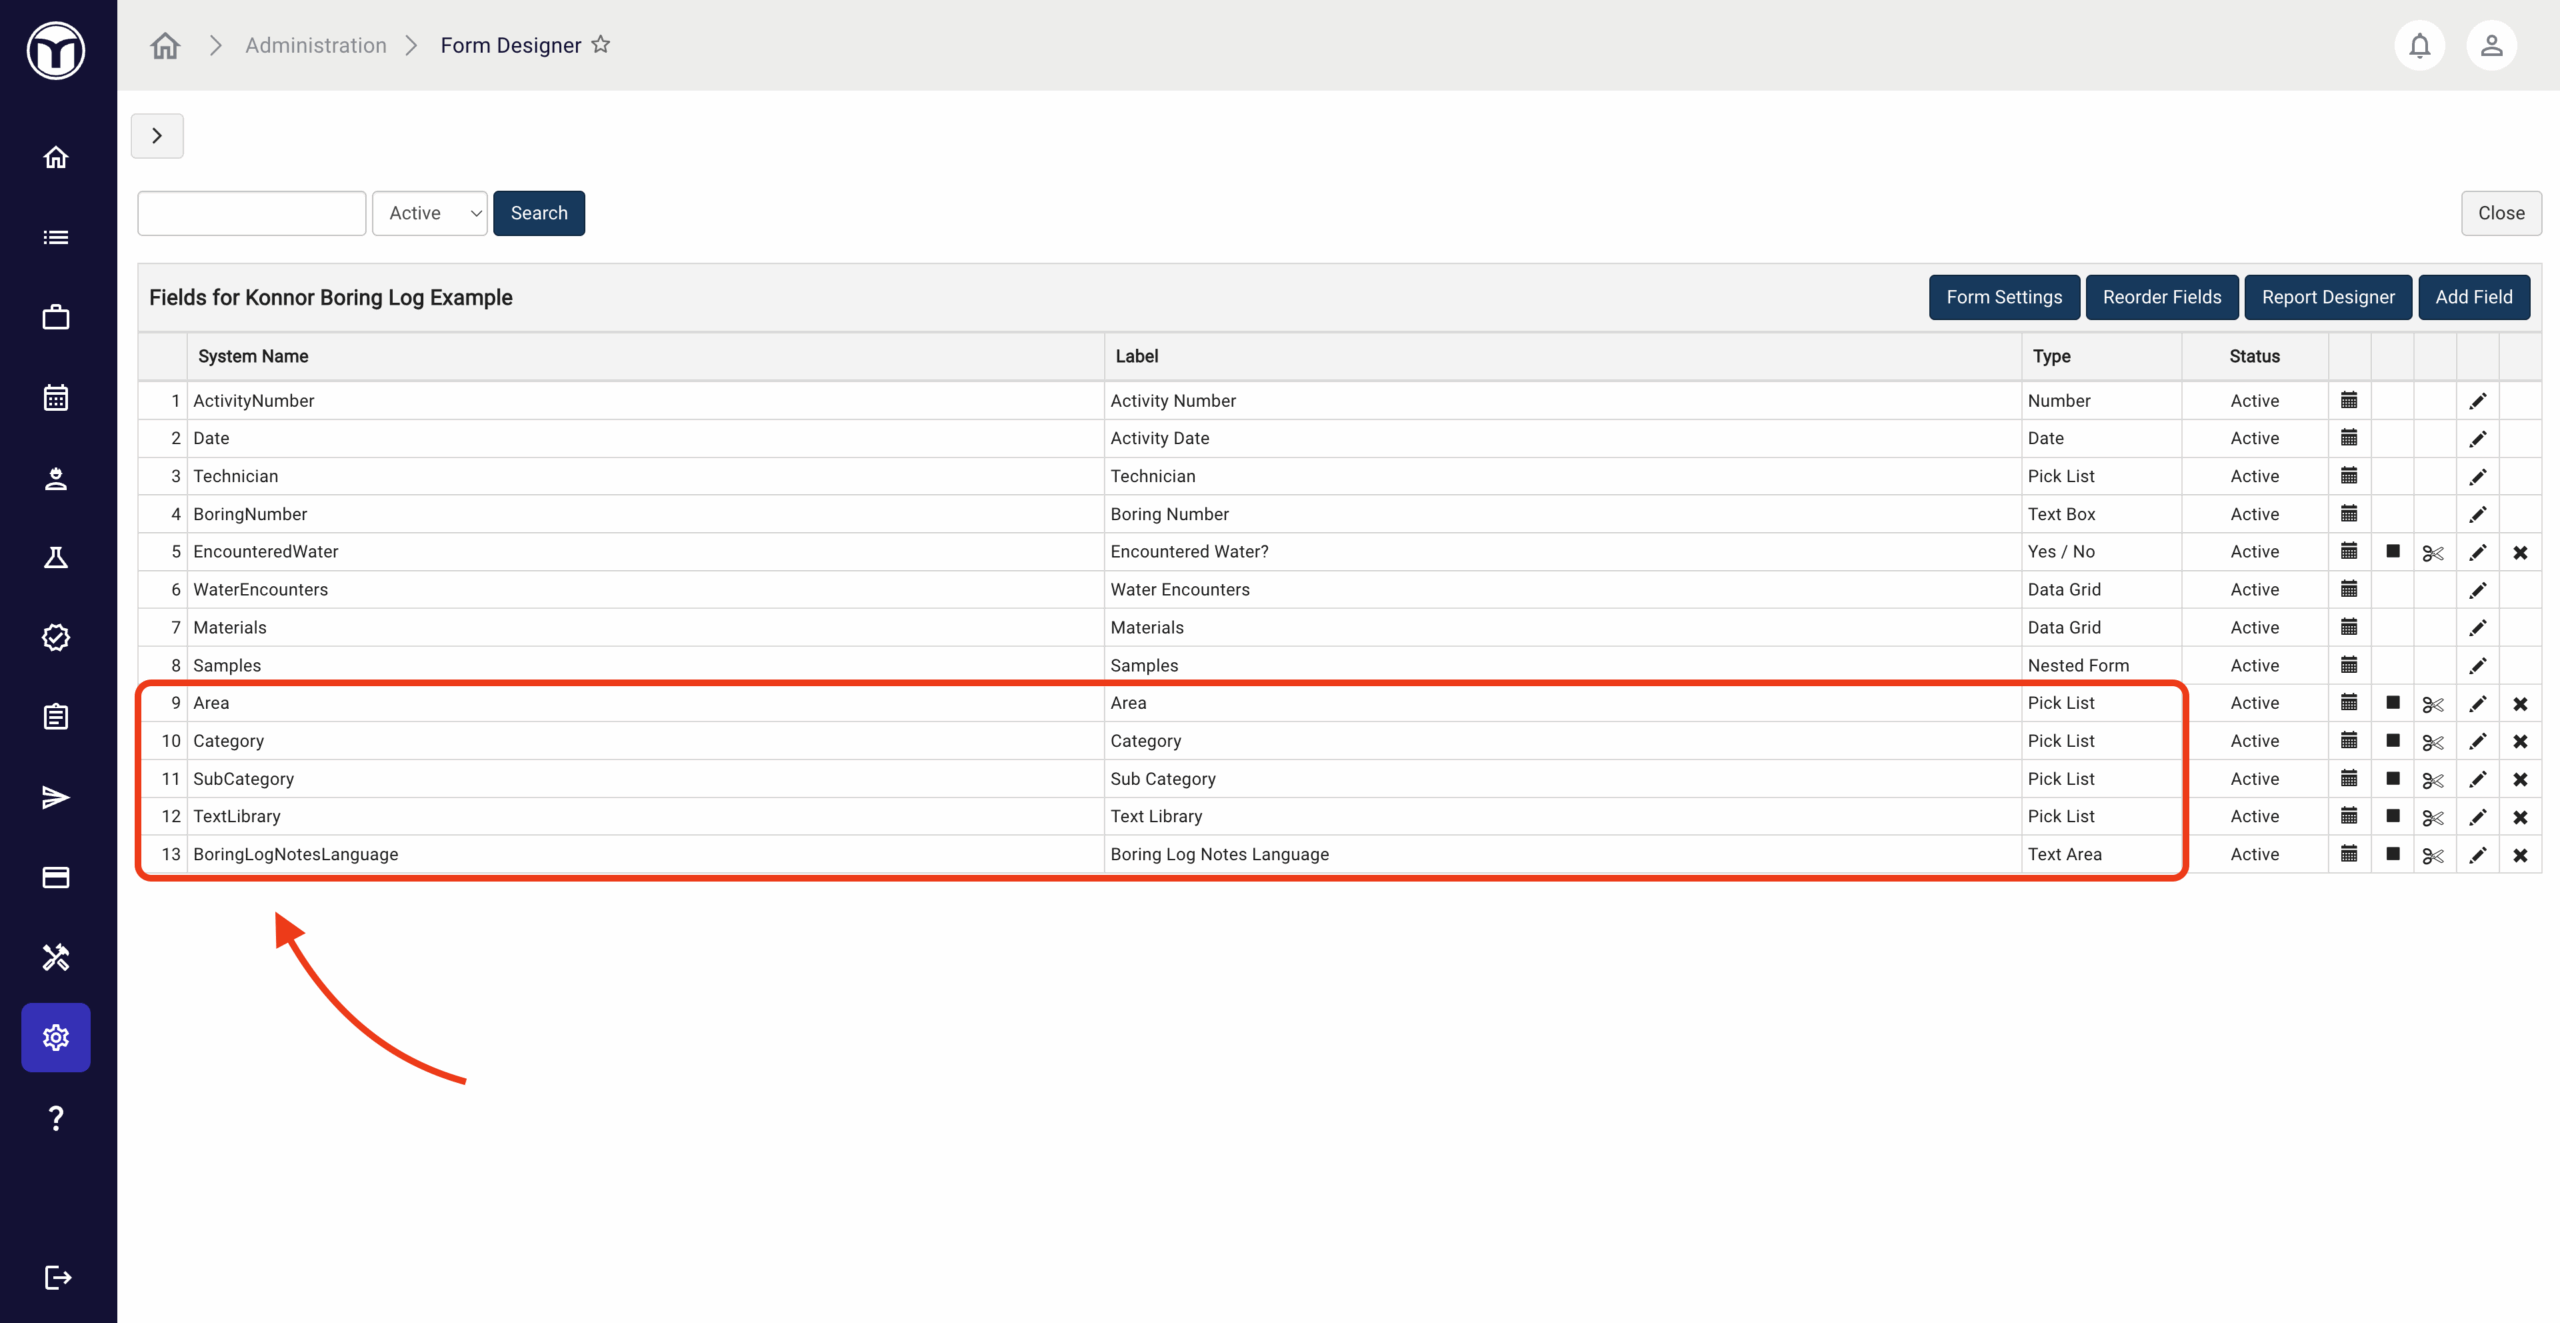
We add four new Pick List fields, which use Data Source and Parent System Name settings to guide users through the hierarchy (Select an Area → Category → Sub-Category → Text Library)


Step 4.
We add a Text Area field, referencing the Text Content as the Data Source.

Step 5.
We open Field → Activity to select our Boring Log form and test these new changes. The new Pick Lists are appearing correctly on the form, and guide the user to select an Area, Category, Sub-Category, and Text Library.
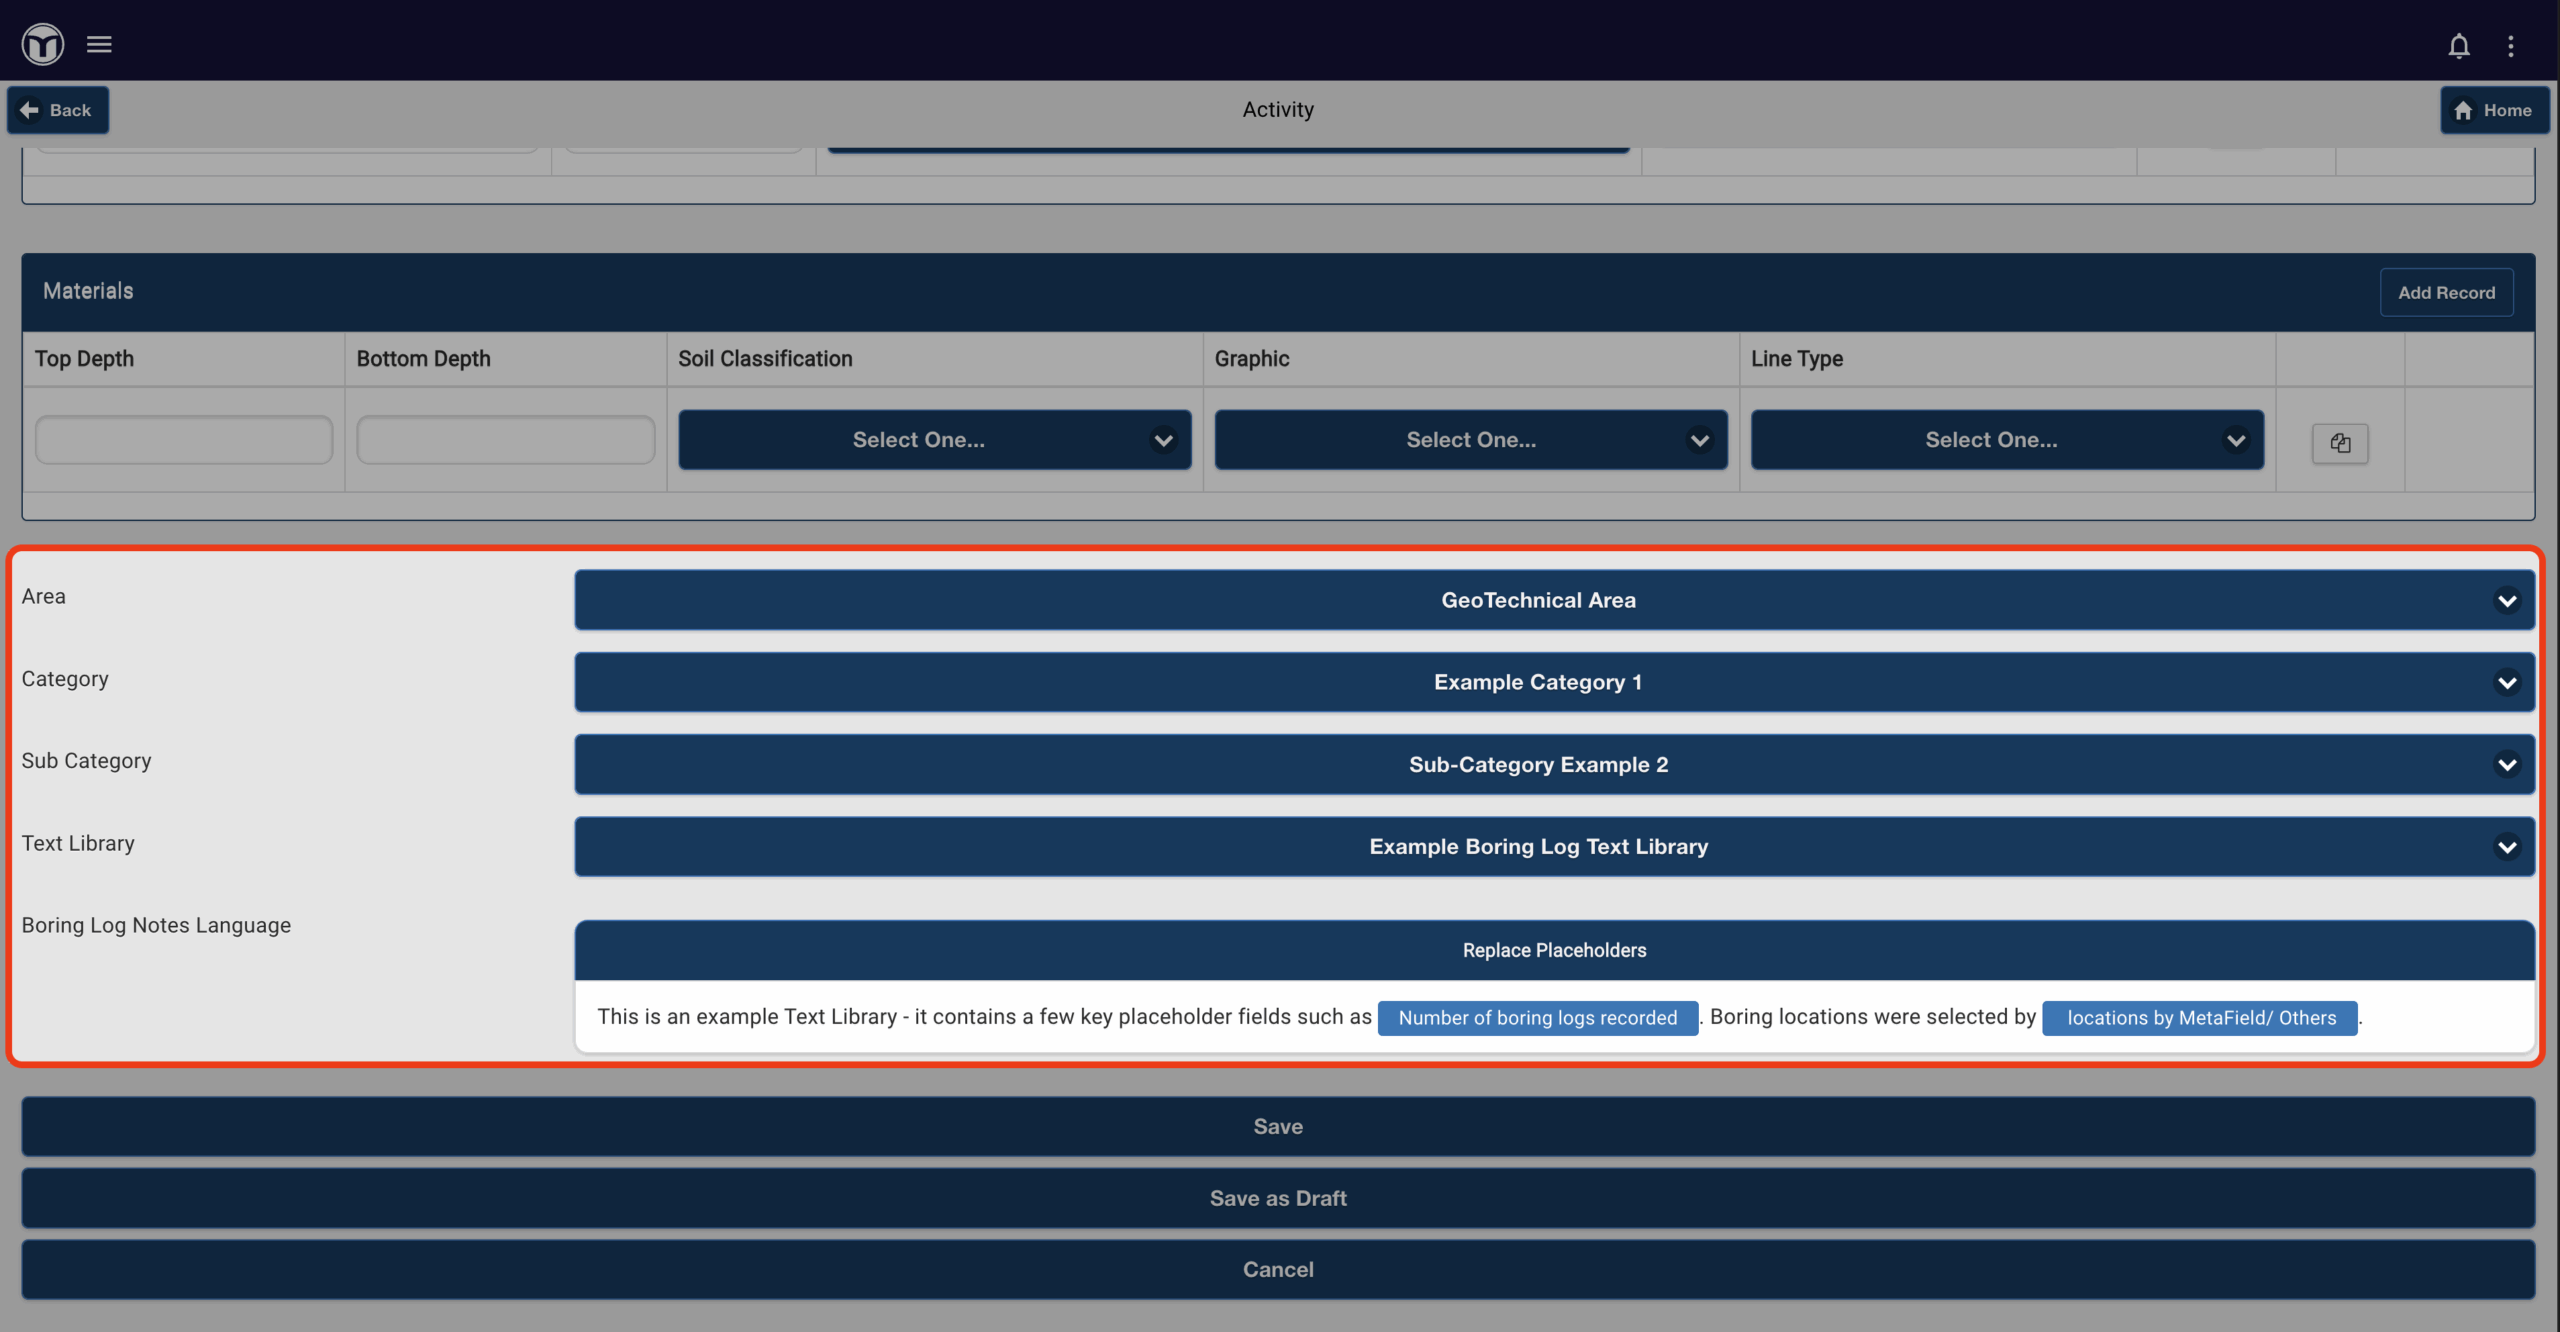
When a user clicks one of the placeholder variables, a new screen will open, allowing them to input and Replace any required values.


Tips & Best Practices
- Use consistent naming conventions for Areas/Categories so users can find content quickly.
- Keep placeholder variables simple and consistent across templates.
- Use color formatting sparingly to maintain readability in reports.
For more information on Text Libraries and how to leverage them for your firm, contact your Customer Success Manager.
Want to keep learning?
Click here for more how-to articles and MetaField guides. You can also access in-app guidance using the Help Desk!