Help Article
Density Testing Enablement (Soil Proctor & Bituminous Results)

Who can use this feature?
By default, Lab users & System Administrators
Purpose
Lab (LIMS) has unique pages for both Soil Proctor Results and Bituminous Results. These areas allow you to add and manage data for soil density tests and bituminous density tests, respectively.
Keeping these pages updated makes it possible for Field users to select the correct proctor or bituminous density result across their on-site density tests.
This article will help you configure these pages and enable density field testing for your firm. Click on the area you’d like to learn about for more:
Lab (LIMS) - Soil Proctor Results
To complete field soil density tests, users must add a proctor to the project. Once added, these proctors can be selected by Field users when performing soil density tests.
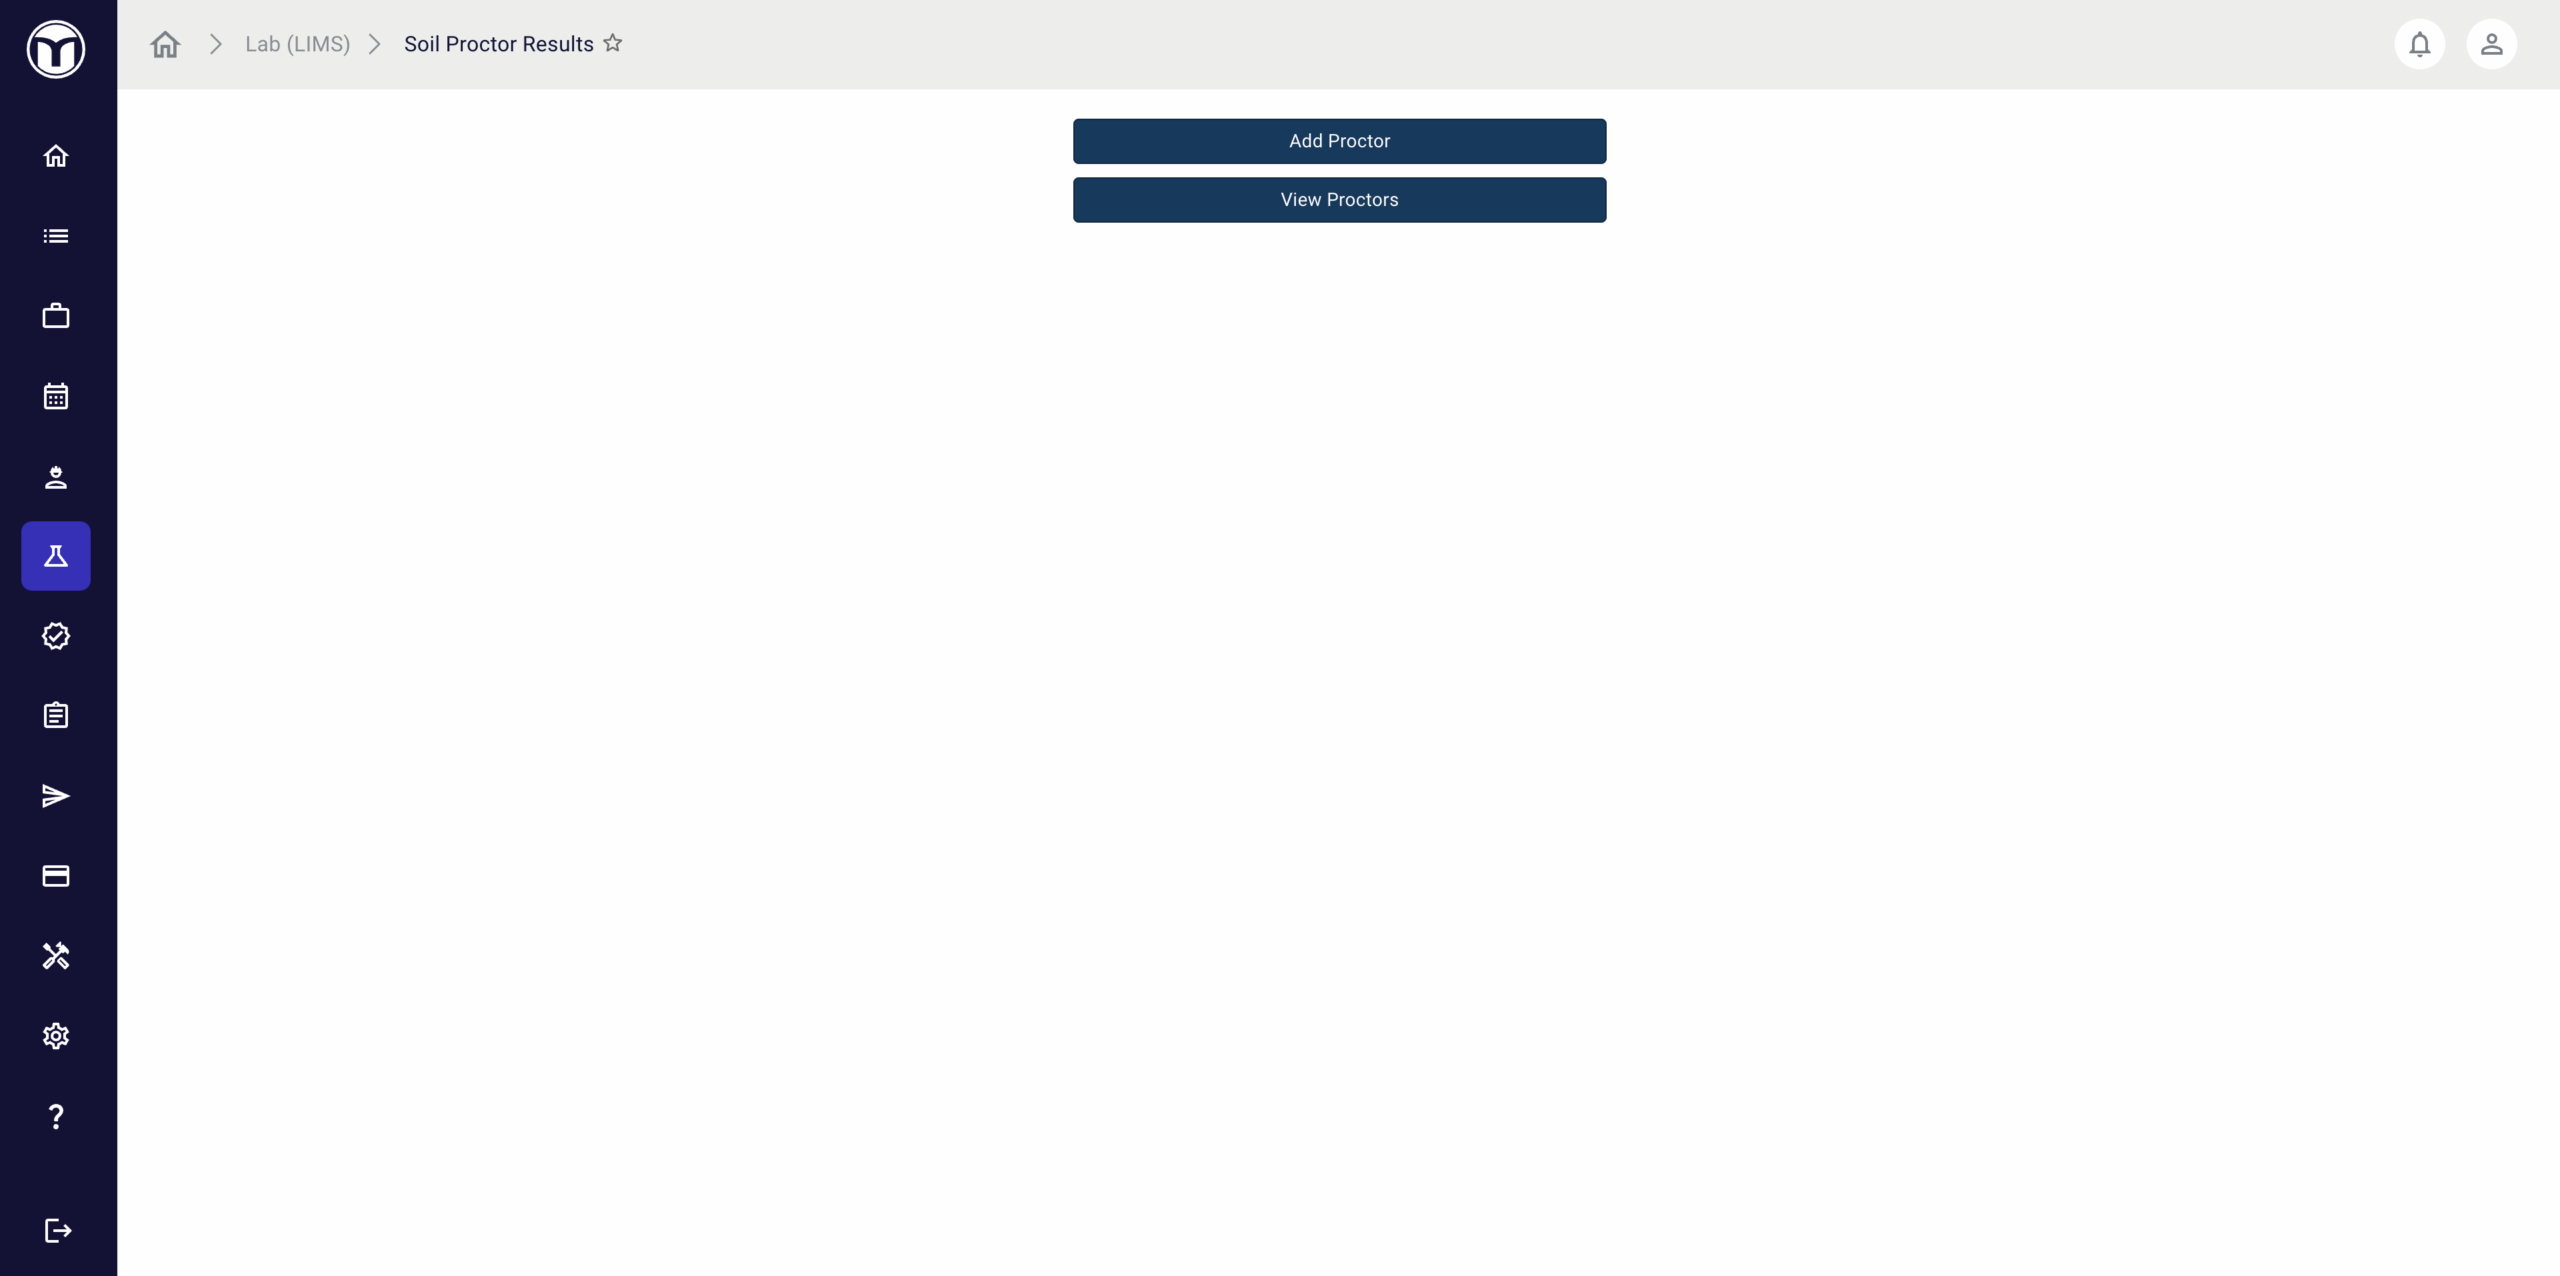
Available actions
- Add proctors for use in soil density tests
- Manage and edit existing proctors
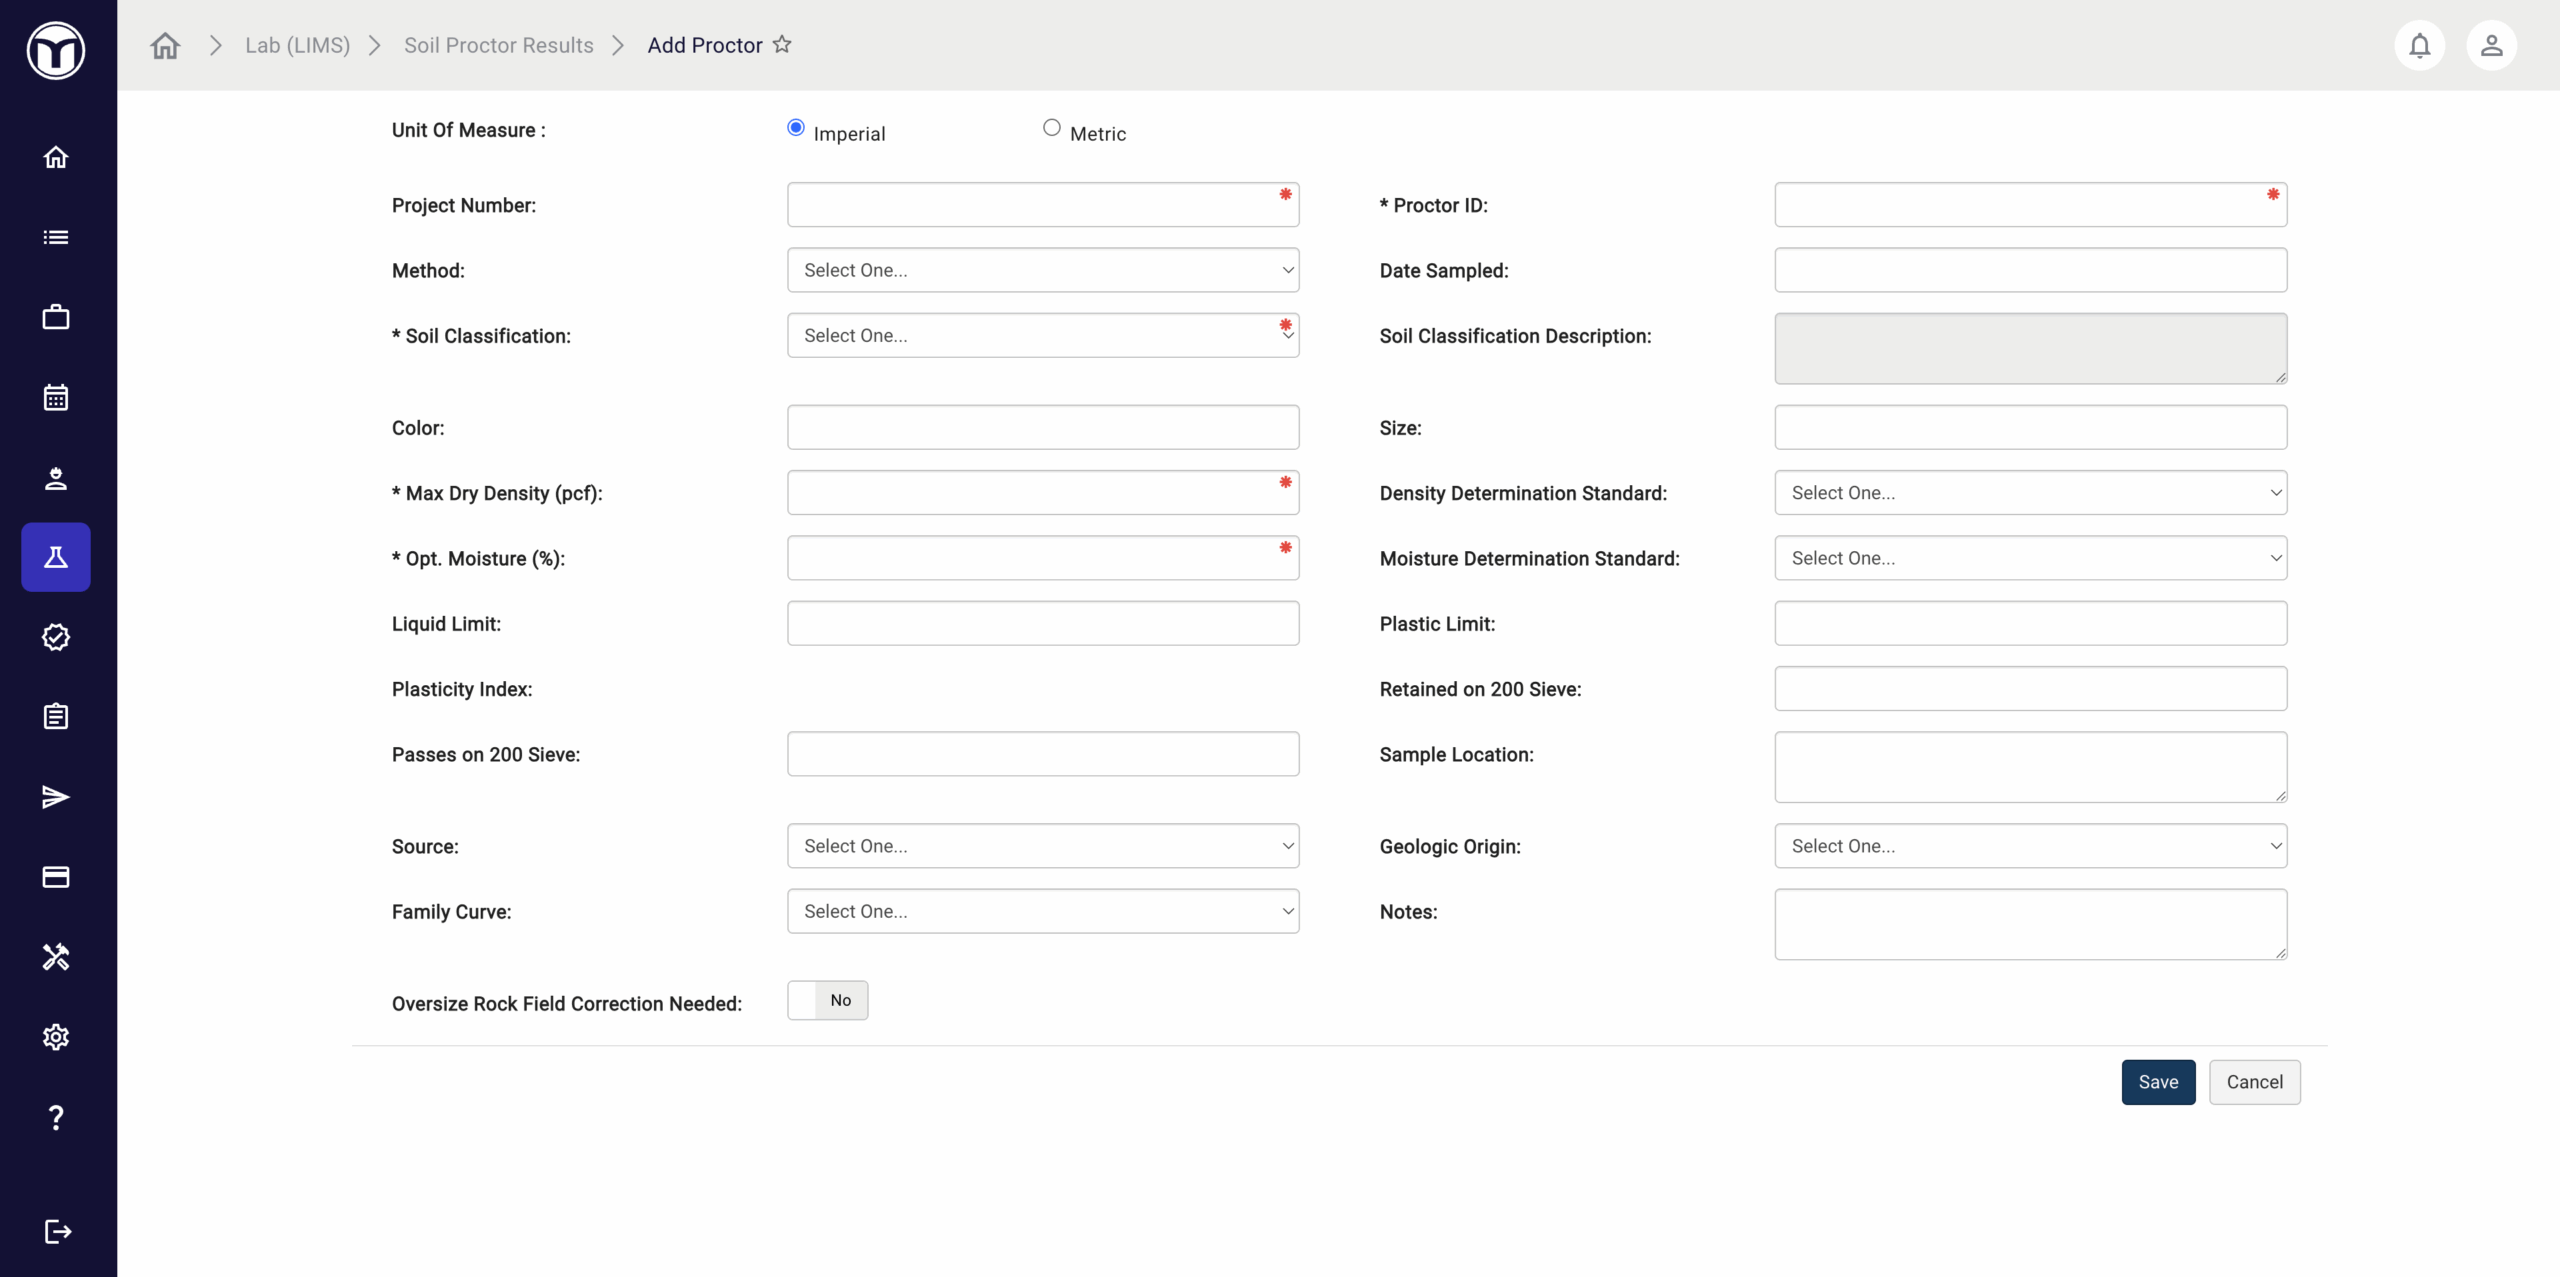
Adding a Proctor: What to Expect
- Press the Add Proctor button
- Enter required data for the proctor (Project Number, Proctor ID, etc.)
- Across this form, you’ll see various dropdowns with pre-set options (such as Soil Classification). These pre-sets are set and maintained by your MetaField Business Administrator. Please contact them for support if the correct options are not shown.
- Press Save
- Once saved, the proctor will be available for selection in Field → Density Testing.
Lab users have the ability to Copy Proctor Data when completing certain test forms (such as forms with fields for Optimum Moisture and Max Dry Density). If available, you will see a new Copy button on the form. This will pre-fill several fields for the proctor, enabling more seamless and efficient lab testing. For more info on this feature, contact your MetaField Representative.

Managing Proctors: What to Expect
Press View Proctors to see a list of all proctors saved to your selected project. From this page, you can perform a few useful commands, including:
- Adding a new proctor to your selected project or another project.
- Copying a proctor from one project to another. The system will default the Proctor ID to the existing value, which can be altered to a new value if needed.
- Uploading a proctor curve/image. Once added, this file can be viewed by field staff when selecting the proctor in Field.
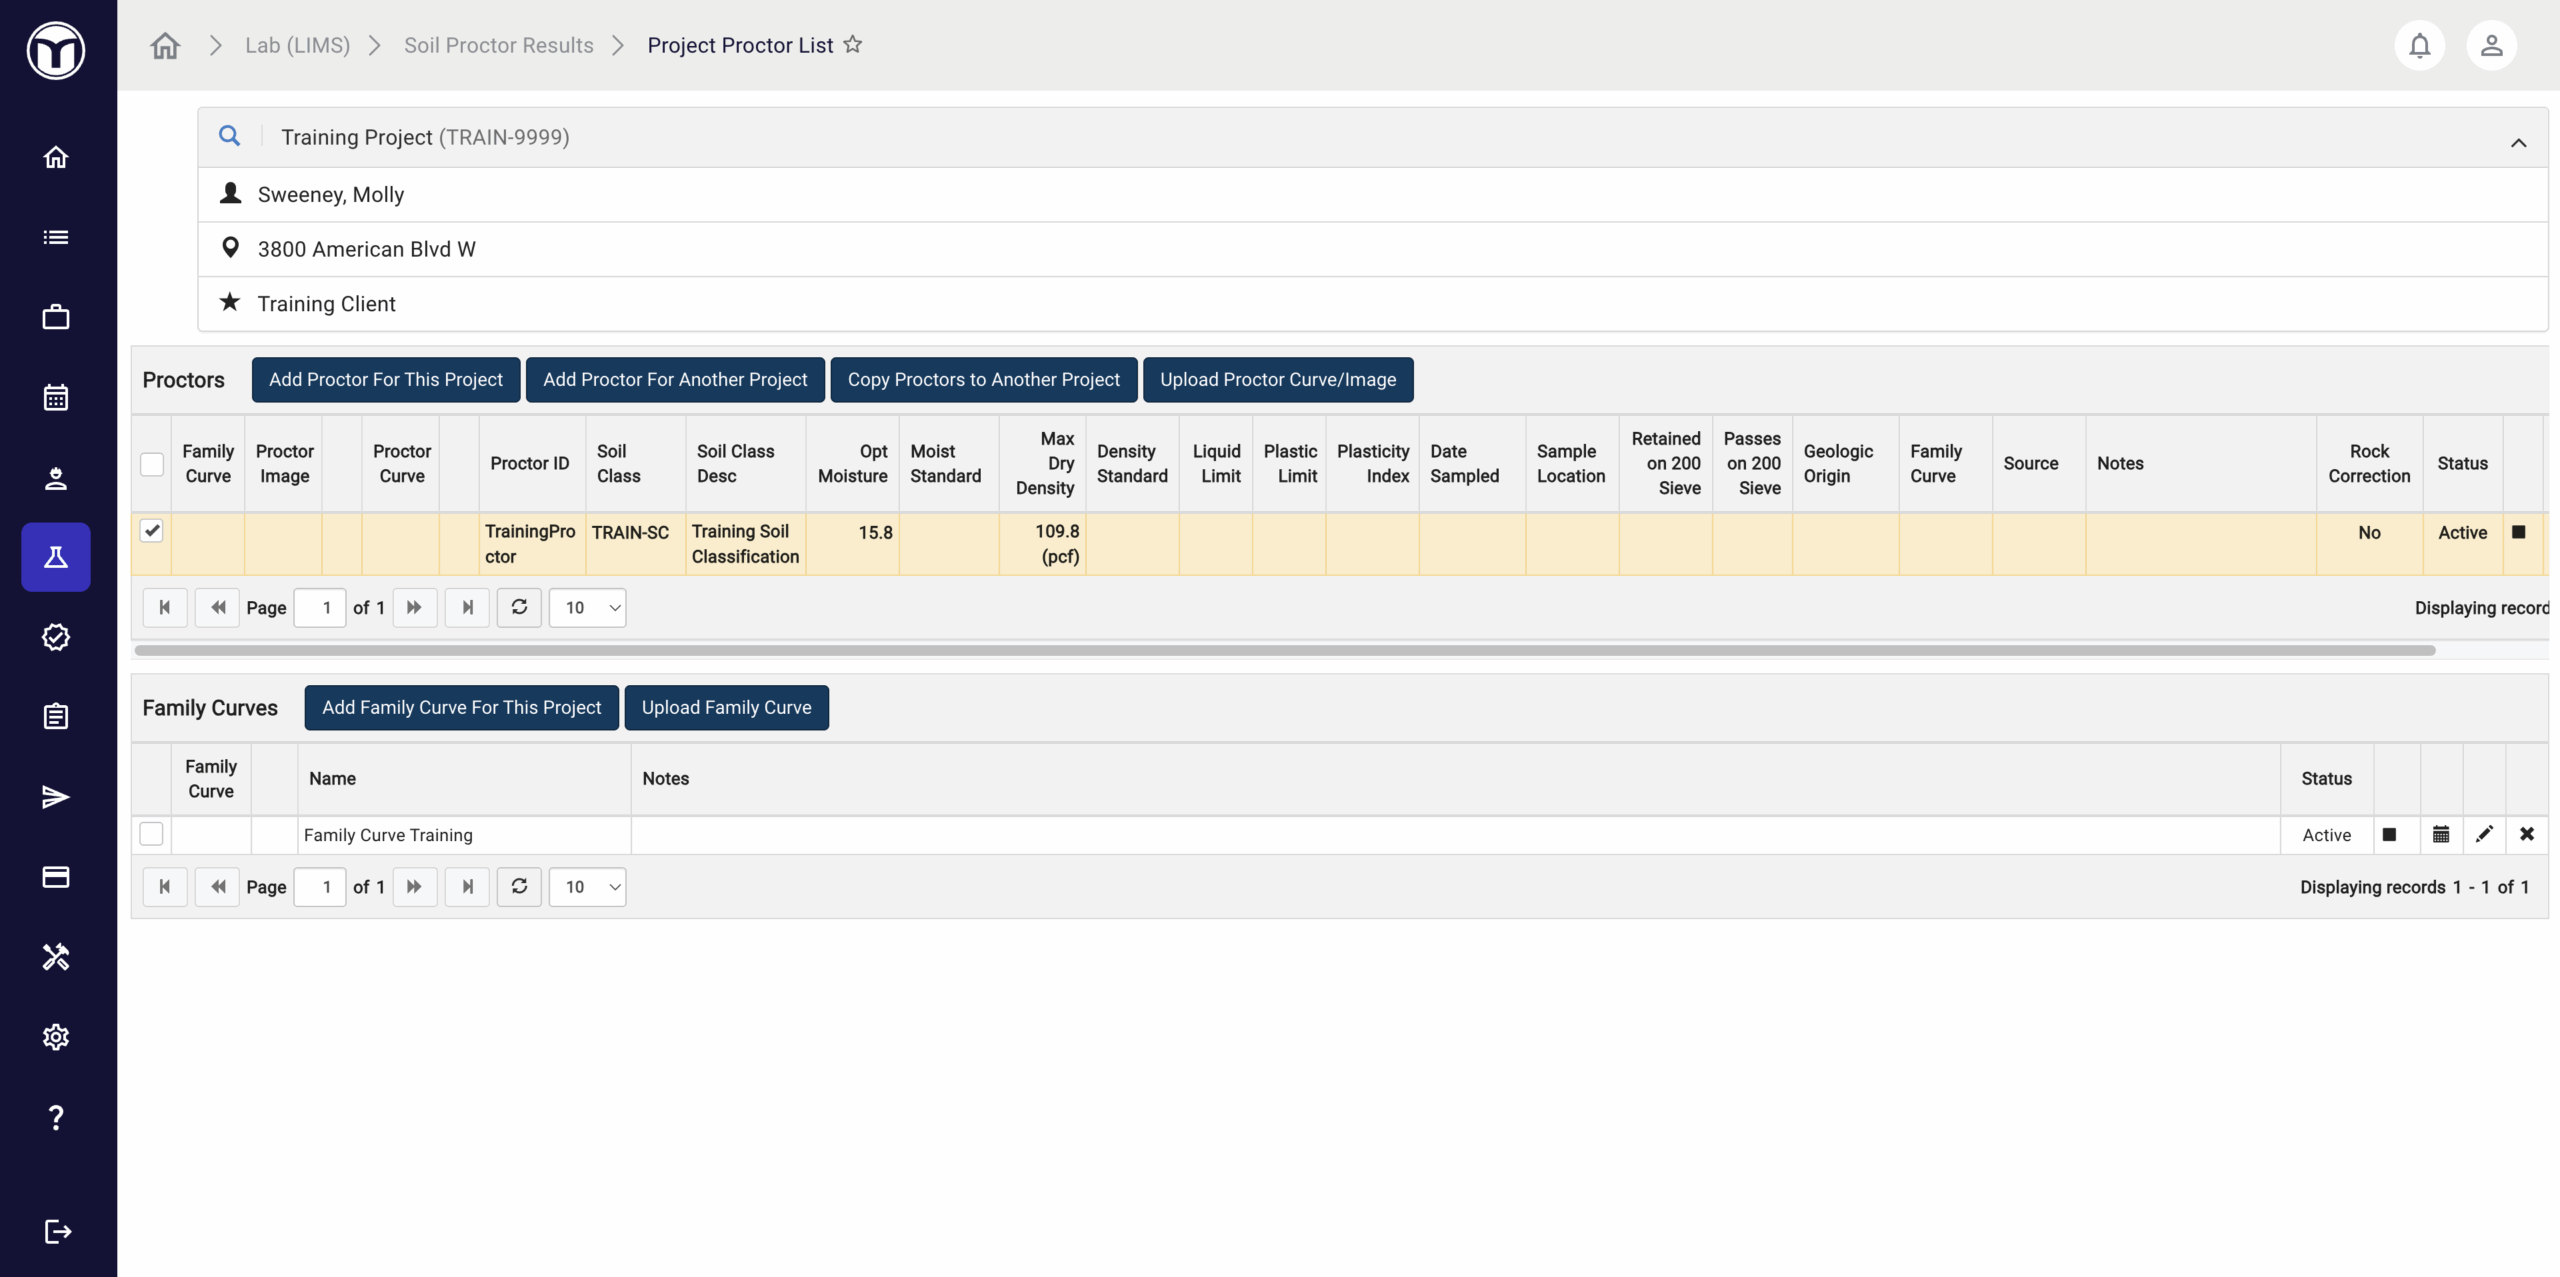
The buttons located on the far-right of each proctor or family curve record allow you to perform various quick actions, including:
- Deactivate (️◼️): Deactivate the record
- History (🗓️): View history of the record (creator, creation date, etc.)
- Activate (▶️): Activates or reactivates the record
- Edit (️✏️): Edit record details or info
- Delete (✖): Delete the record

Bituminous Results
To enable bituminous density testing, your firm must first enter bituminous density values into this area of Lab (LIMS).
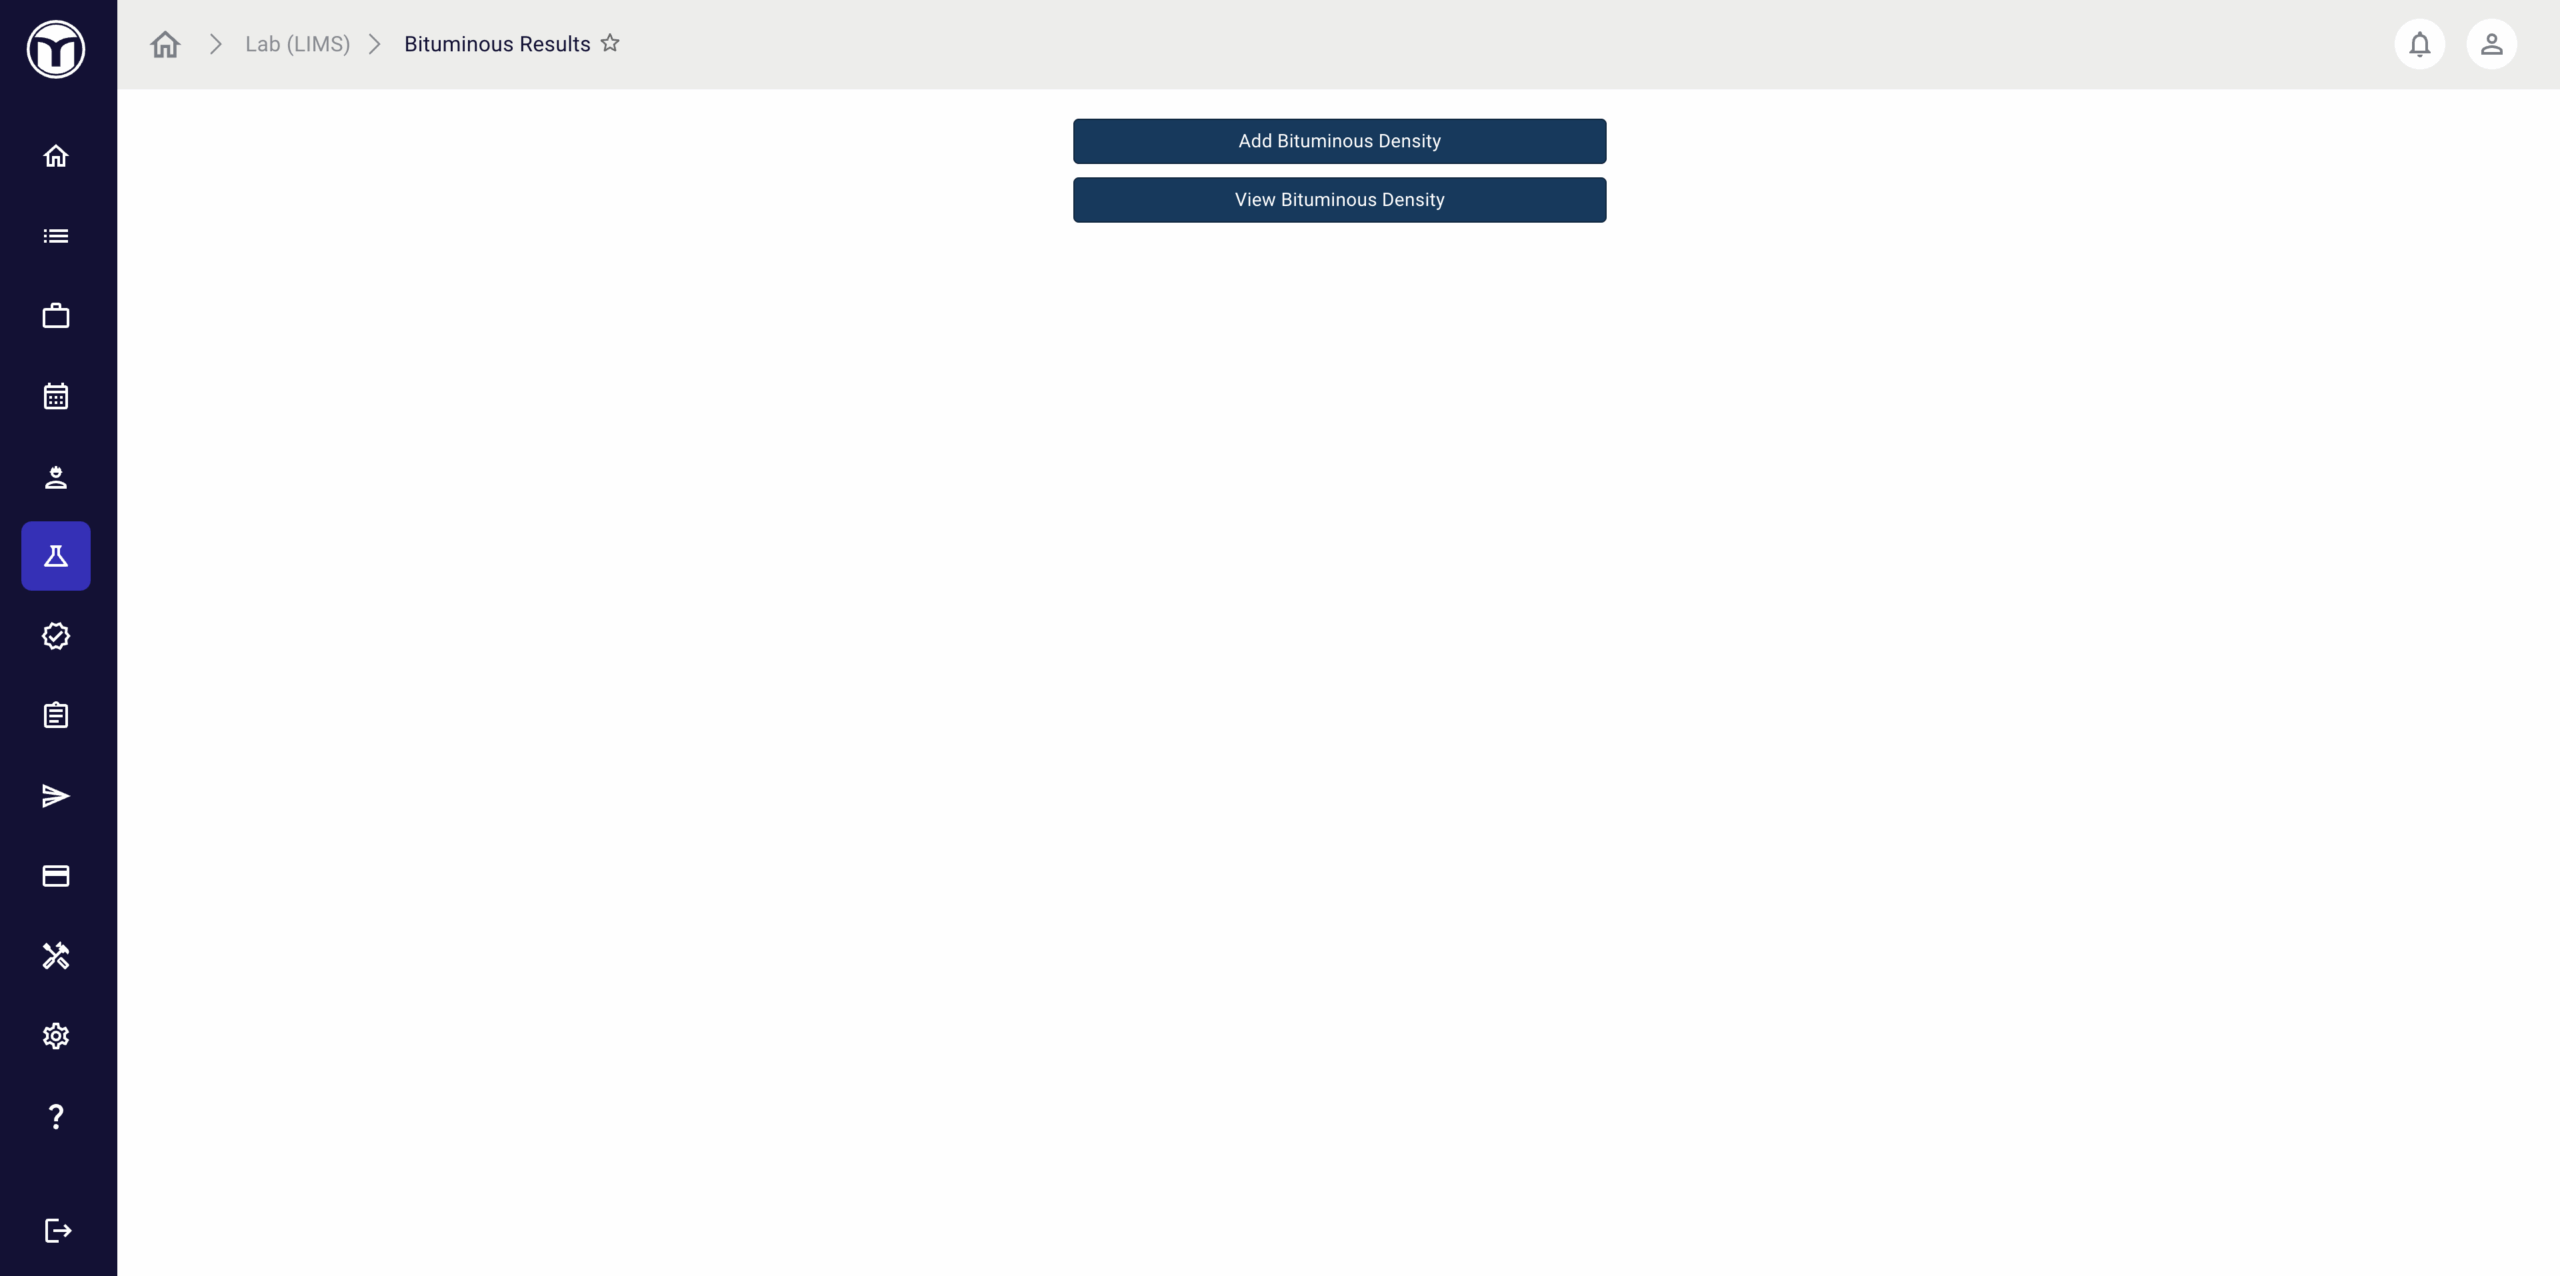
Available actions
- Add values for use in bituminous density tests
- Manage and edit existing bituminous density values
Note: The system only allows bituminous results to be added to active projects. If you are unable to add a bituminous result, make sure the project is Active in your source system.
Adding Bituminous Density: What to Expect
- Press the Add Bituminous Density button
- Enter required density data (Project Number, Sample ID, etc.)
- Across this form, you’ll see dropdowns with pre-set options (such as Test Method). These pre-sets are set and maintained by your MetaField Business Administrator. Please contact them for support if the correct options are not shown.
- Press Save
- Once saved, this new value will be added to the View Bituminous Density page of Lab (LIMS).
Managing Bituminous Density: What to Expect
Press View Bituminous Density to see a list of all density values saved to your selected project.
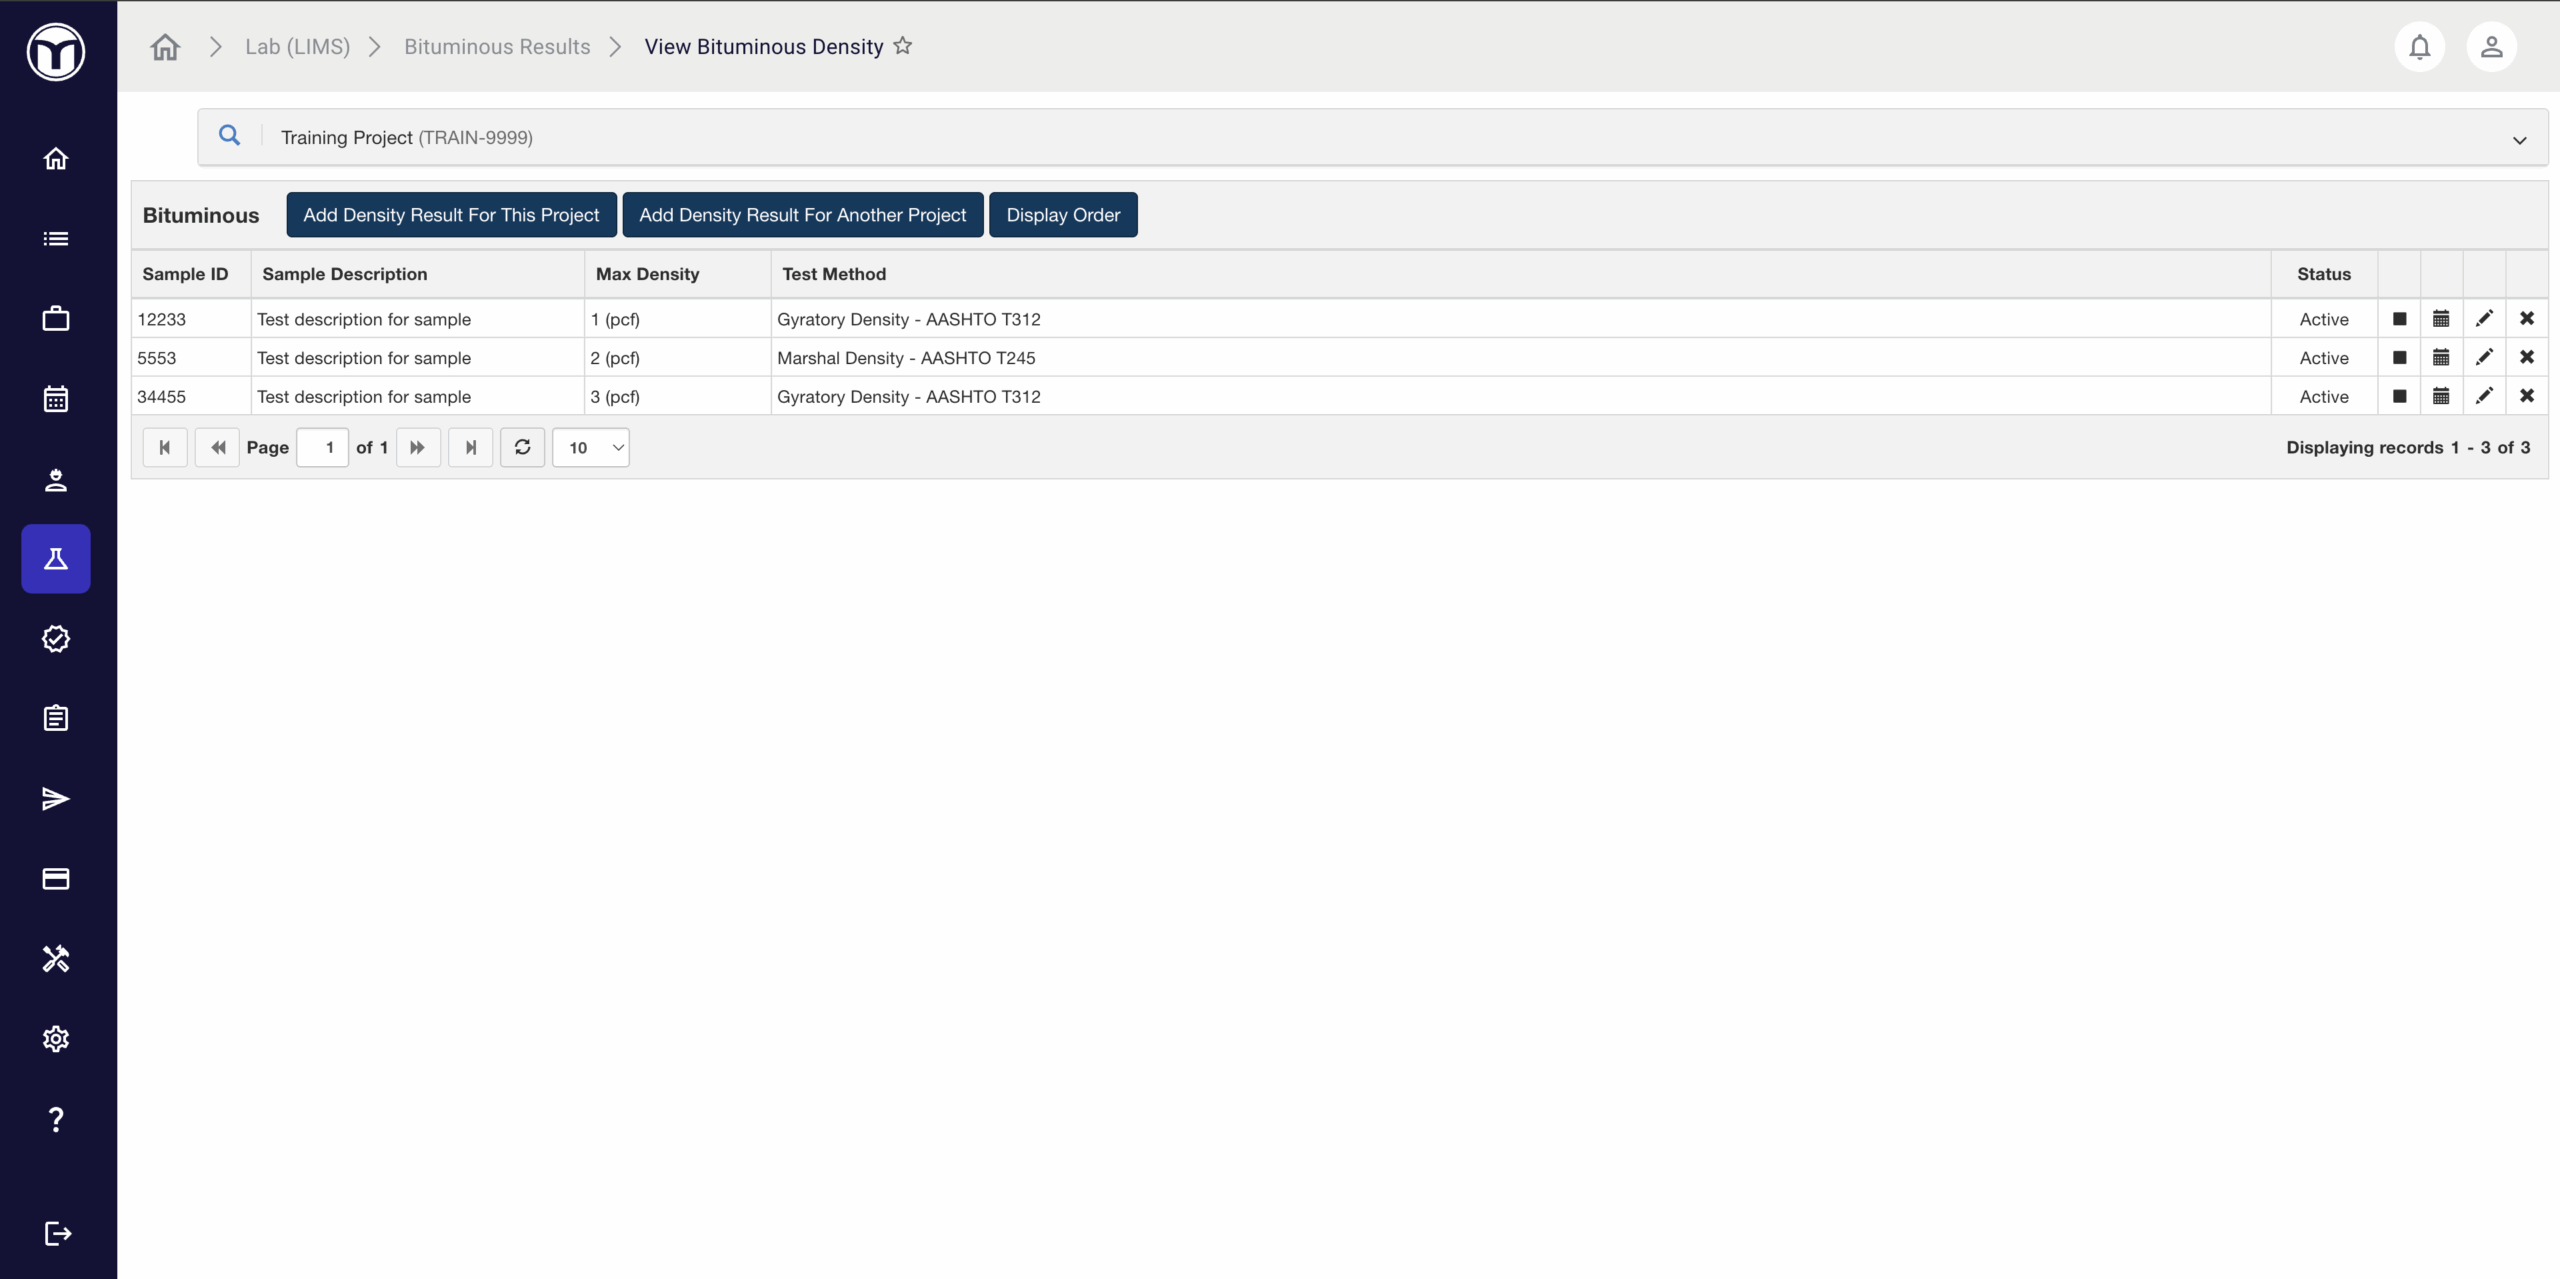
From this page, you can perform a few useful commands, including:
- Adding new density results to your selected project or another project.
- Altering the Display Order of your density results (click & drag to rearrange)
The buttons located on the far-right of each bituminous record allow you to perform various quick actions, including:
- Deactivate (️◼️): Deactivate the record
- History (🗓️): View history of the record (creator, creation date, etc.)
- Activate (▶️): Activates or reactivates the record
- Edit (️✏️): Edit record details or info
- Delete (✖): Delete the record

Note: Only density results that have not been associated with a density test can be deleted.
Density Testing Enablement FAQs
How do I edit or delete a proctor that has been used on a test?
Changing proctors can affect previously reported density tests. Therefore, editing proctor test results is restricted to users with the LIMS → Soil Proctor Results → Manage Soil Proctors permission. If you find that a proctor contains incorrect information but is currently in use, please contact your project manager or MetaField Administrator for support.
How do I make sure a proctor is not used on future tests?
Deactivate the proctor. A proctor in the status of Inactive will remain on all tests where it was used, but will not be available for any future tests.
How do I change the proctor on a test that has already been saved?
In Review (Quality Control), your project manager can change the proctor on any test until the test has the status of Complete.
Want to keep learning?
Click here for more how-to articles and MetaField guides. You can also access in-app guidance using the Help Desk!